Setting up a projector for the first time? Don’t worry it’s easier than you think. Follow these simple steps, and you’ll have your projector up and running in no time.
Finding the Perfect Spot
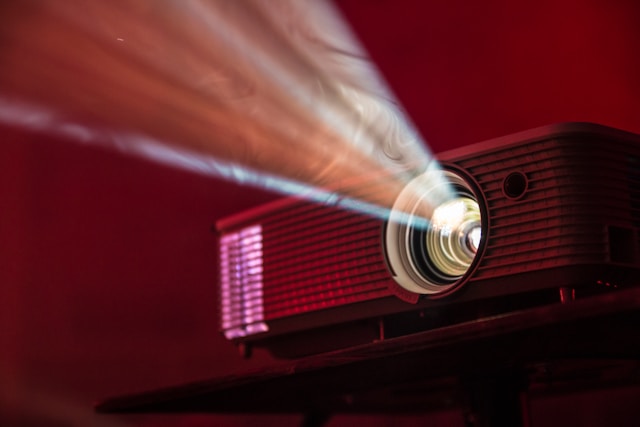
The key to a great setup is choosing the right location. Your projector should have a clear, direct path to the screen, no obstructions allowed. A well-placed projector ensures the best picture quality and an optimal viewing experience.
Connecting Your Projector
Next, plug your projector into a power source and connect it to your video device (laptop, streaming device, or Blu-ray player). Double-check that all cables are securely connected. If you’re unsure which cables to use, consult the user manual.
Adjusting Settings for the Best Picture
Every room has different lighting, so tweak your projector’s brightness and contrast settings to match your environment. A few small adjustments can make a huge difference in image quality.
Choosing the Right Projection Surface
A smooth, white surface is ideal for the best picture clarity. If you don’t have a projection screen, a clean, light-colored wall will work just fine.
Need professional help? Tech4U offers expert installation services to make setup effortless whether for home or business use.
Projector Types
Not all projectors are the same. The type you choose affects picture quality, performance, and placement. Here’s a quick breakdown:
DLP vs. LCD vs. LED
- DLP (Digital Light Processing): Sharp images with great contrast but may cause a slight “rainbow effect.”
- LCD (Liquid Crystal Display): Vibrant colors and energy-efficient but may lack deep blacks.
- LED (Light Emitting Diode): Long-lasting, energy-saving, and portable, but not always as bright.
What is Throw Ratio?
The throw ratio determines how far the projector needs to be from the screen for a specific image size.
- Short throw: Perfect for small spaces, as it projects a large image from a short distance.
- Long throw: Ideal for larger rooms, requiring more space between the projector and the screen.
Resolution & Brightness Matter
- Resolution: The higher, the better! Common choices include 720p, 1080p, and 4K.
- Brightness: Measured in lumens. For home use, lower lumens work, but for bright spaces (like offices), go for 3,000+ lumens.
Balancing resolution and brightness ensures a clear, high-quality image.
Essential Tools for Installation
Having the right tools makes setup much smoother. Here’s what you need:
Mounting Hardware
- Mounts: Wall or ceiling mounts should be sturdy and adjustable.
- Brackets & Screws: Essential for stability, check the mount specs.
- Stud Finder: Helps locate secure spots for installation.
- Drill: For making necessary holes.
Cabling & Accessories
- HDMI Cables: Best for high-quality video/audio.
- Power Cables: Ensure they’re long enough.
- Cable Ties & Clips: Keep cables organized.
- Adapters: Handy if your devices have different ports.
- Remote & Batteries: Essential for easy operation.
Measuring & Alignment Tools
- Tape Measure: Ensures correct projector placement.
- Level: Keeps your projector aligned for a straight image.
- Laser Pointer: Helps center the projector with the screen.
Preparation Steps Before Installation
Good preparation ensures a smooth setup. Here’s what to check:
Assess Your Room Layout
- Measure the space to find the best projector placement.
- Avoid pathways to prevent accidental bumps.
- Check ceiling height for mounting considerations.
- Ensure ventilation to prevent overheating.
Choosing a Projection Surface
- Projection Screen: Provides the best image quality.
- Wall: Works fine if smooth and light-colored.
- Screen Types:
- Fixed screens: Ideal for permanent setups.
- Pull-down screens: Great for multi-use spaces.
- Special screen paint: An alternative for walls.
Lighting Considerations
- Minimize ambient light for a clearer picture.
- Use blackout curtains to block external light.
- Position lamps carefully to avoid screen glare.
Step-by-Step Installation
Now that you’re ready, let’s install your projector.
Securing the Mount
- Choose a sturdy ceiling or wall mount.
- Use a stud finder to locate strong mounting points.
- Mark spots for drilling and install the brackets securely.
- Ensure the mount is aligned with the screen.
Positioning the Projector
- Measure the correct distance for your throw ratio.
- Align the projector lens with the screen’s center.
- Adjust height and angle to reduce distortion.
Calibrating the Image
- Use keystone correction to fix any angle distortion.
- Fine-tune focus and zoom for a sharp picture.
- Adjust brightness and contrast for the best clarity.
Connection & Configuration
Your projector is installed, now let’s connect and configure it.
Power & Video Source Setup
- Plug into a stable power source (use a surge protector).
- Connect to your device using an HDMI, VGA, or USB cable.
- Use adapters if necessary for older devices.
Audio Options
- Built-in speakers are okay, but external speakers sound better.
- Connect via audio jacks, Bluetooth, or optical cables.
- Test audio before use and adjust volume levels.
Final Adjustments
- Align the projector angle and image size.
- Configure settings for resolution, brightness, and contrast.
- Check for firmware updates to keep your projector running smoothly.
Operation & Maintenance
Keep your projector in top shape with these simple tips:
Safe Usage Tips
- Place on a stable surface to prevent falls.
- Keep cables tidy to avoid tripping hazards.
- Ensure good ventilation to prevent overheating.
- Turn off and let cool before moving.
- Use a surge protector to prevent power damage.
Cleaning & Care
- Wipe the exterior with a soft, dry cloth.
- Clean the lens with microfiber cloth and lens cleaner.
- Check and clean air filters regularly.
- Replace lamps according to the manufacturer’s instructions.
Ready to Enjoy Your Projector?
With these tips, you’re all set for an amazing viewing experience. Whether for home entertainment, gaming, or business presentations, a properly installed projector makes a huge difference. Need extra help? Our experts can set up everything perfectly for you.
Now, sit back, grab some popcorn, and enjoy your new setup!